Table of Contents
Overview
A Call Flow is the definition of how SIP Caller will interact with your contacts, once the call is established. But usually the interaction should not be the same if the call is answered by a human or an answering machine. This is why we perform real time speech analysis, to identify the answering endpoint, and let you configure a different Call Flow for the case of human answer, and answering machine. By doing this, for example, you can run a survey when a human answers the call, and just leave a message if a voicemail is detected.
Creating a Call Flow
You can create call flows in 2 ways:
- Using templates - easiest method
- Using the designer - advanced method, requires Professional or Enterprise Edition
The easiest way to do this is using templates. We provide templates for the most common use cases, which you can use from a step by step wizard. And when you have a scenario not supported by the standard templates, you can use the designer to create it according to your needs.
Create from template
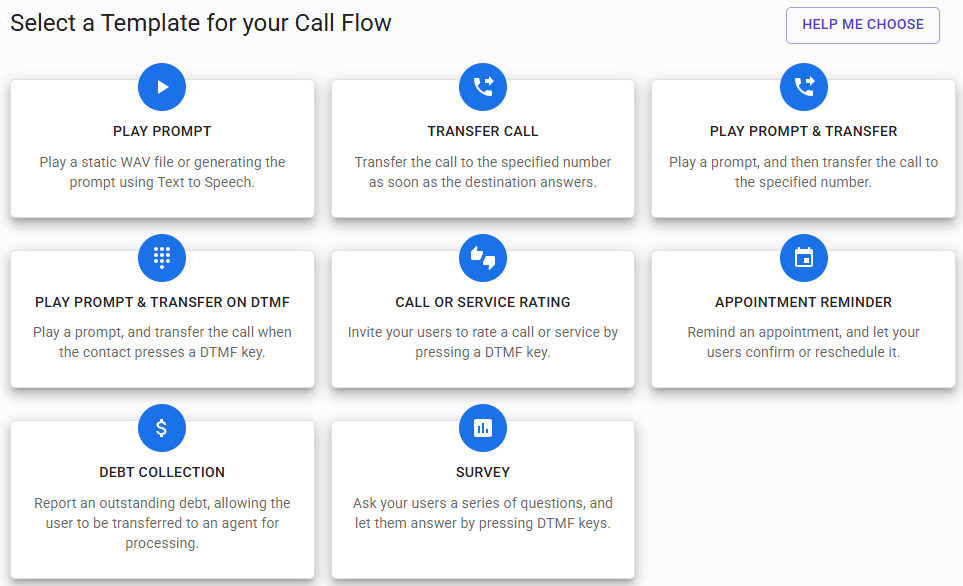
To create a Call Flow using templates, go to “Call Flows” > “Create from template”. You can choose any of the following templates:
- Play Prompt
- Transfer Call
- Play Prompt & Transfer
- Play Prompt & Transfer on DTMF
- Call or Service Rating
- Appointment Reminder
- Debt Collection
- Survey
Create with designer
To create a Call Flow with the designer, go to “Call Flows” > “Create with designer”. You will be asked to provide a name for the call flow, and then you can start adding actions. Actions are executed from top to bottom.
The “Validate” toggle lets you check possible issues with the call flow while you’re designing it.
Add an action
To add an action, click the green plus (+) button, and choose the type of action you want.
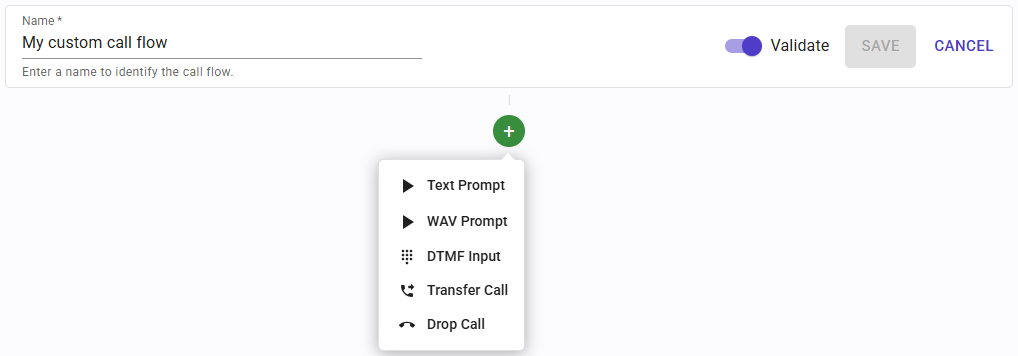 The available actions are the following:
- Text Prompt: play a prompt by specifying the text, so SIP Caller automatically converts it to speech.
- WAV Prompt: upload a WAV file to be played.
- DTMF Input: collect 1 or more DTMF digits from the user.
- Transfer Call: transfer the call to the number you define.
- Drop Call: hang up.
Configure & Delete an action
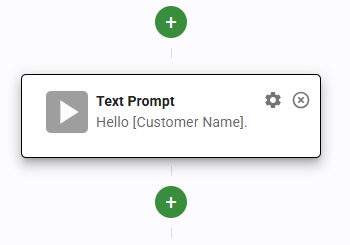 Once an action is added, you will see 2 buttons on the upper right corner:
- Configure: this opens a configuration dialog, where you can specify the action details.
- Delete: this removes the action from the designer.
Actions details
Text Prompt
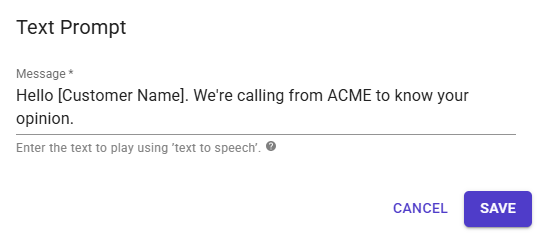 This action requires 1 setting:
Message: this is the text of the prompt to play. The message can be static, or have variables, to play a different prompt on each call, for example an appointment date, a due balance, and so on. Variables are specified in square brackets:
Hello [CustomerName], you have an appointment with us on [AppointmentDate].
You will be able to provide variable values for each call when uploading the numbers for the campaign.
The message can be plain text, or SSML to customize the generated audio by providing details on pauses, and audio formatting for acronyms, dates, times, abbreviations, or text that should be censored. More information here, here and here.
WAV Prompt
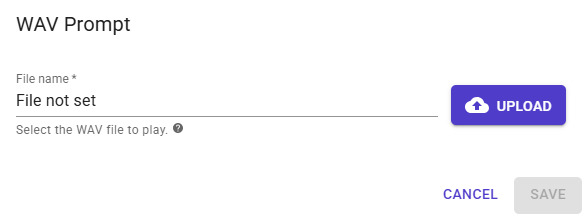 This action requires that you upload a WAV file with the following format:
- Format: WAV
- Channel: Mono
- Bit rate: 8 kHz
- Sampling: 16 bit
- Maximum size: 5Mb
DTMF Input
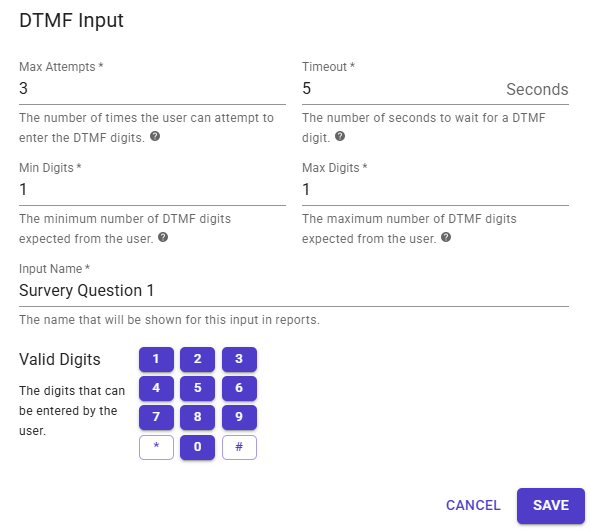 This action performs the following steps:
- It plays the prompt specified as “Main Prompt”.
- It waits for DTMF digits during the specified timeout.
- When no DTMF digit is received, or when the DTMF digits are not valid, the “Error Prompt” is played, and then the “Main Prompt” is played again.
- This cycle is repeated until the maximum number of attempts is reached.
You must specify the minimum and maximum number of digits to collect, and a name for the input. This name is used in reports to show how your users are answering to this action.
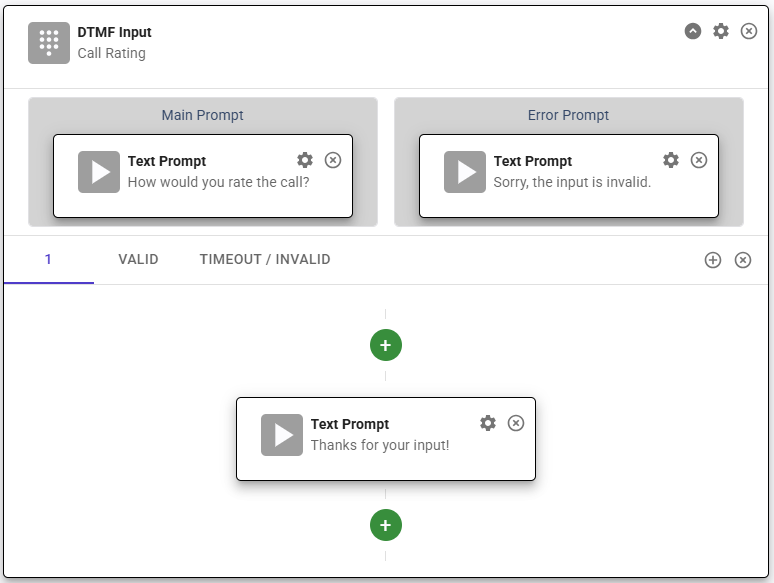
At the bottom of the DTMF Input action, you can configure children actions to be executed when the user provides specific responses. For example, if you want to play a prompt when the user presses “1”, you need to add an output for the value “1”, and then add children actions there. If the input is considered valid but there is no specific child branch that matches it, then the actions from the “Valid” branch are executed. If the input is invalid or no input is detected, the actions from the “Timeout / Invalid” branch will be executed once all attempts have been consumed.
Transfer Call
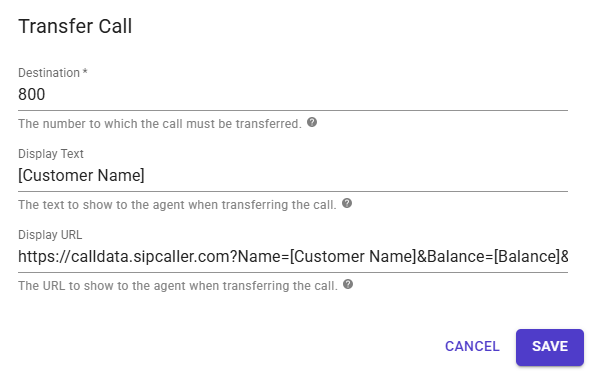 This action requires 4 settings:
- Destination: this is the number to which the call must be transferred. You can specify a static number here, for example the extension number of a queue where all your agents are waiting for these calls, or you can also use variables, for example to transfer the call to the agent associated with a particular customer. Variables are specified in square brackets:
[AgentExtension]
You will be able to provide a value for each call when uploading the numbers for the campaign.
- Timeout: the time to wait for the transfer to complete. If the transfer is not complete after this time, the call will be dropped.
- Display Text: when using 3CX Phone System and the call is transferred to an agent while running a campaign in predictive dialer mode, or initiated by an agent in progressive dialer mode, SIP Caller can show custom text to the agent using the 3CX Web Client. The text specified here can have static and dynamic parts, using variables.
- Display URL: when using 3CX Phone System and the call is transferred to an agent while running a campaign in predictive dialer mode, or initiated by an agent in progressive dialer mode, SIP Caller can show a custom URL to the agent using the 3CX Web Client. The URL specified here can have static and dynamic parts, using variables.
Drop Call
This action has no configuration parameters, and will drop the call when executed.
Drag & Drop
Actions can be moved around. To do this, click on an action and drag it. You can drop it on any green plus (+) button, when you hover this button you will see that it becomes red, indicating that it’s ready to accept the action.
Editing a Call Flow
Call Flows are editable as long as they’re not being used by a campaign. Once a campaign is started, the Call Flows being used by it are automatically switched to read-only mode. This is to avoid issues with statistics.
If you need to create a campaign using a slightly different Call Flow, you can always duplicate an existing Call Flow, and make the changes to the copy. Then you configure your campaign with this new Call Flow.
