AI Agents
Azure

Overview
To use Azure AI agents in SIP Caller, you need an API Key and an Endpoint from Microsoft Azure AI Foundry. Follow the steps below to obtain them.
Step 1 — Create a Project in Azure AI Foundry
Go to Azure AI Foundry and create a new project. Fill in the following fields:
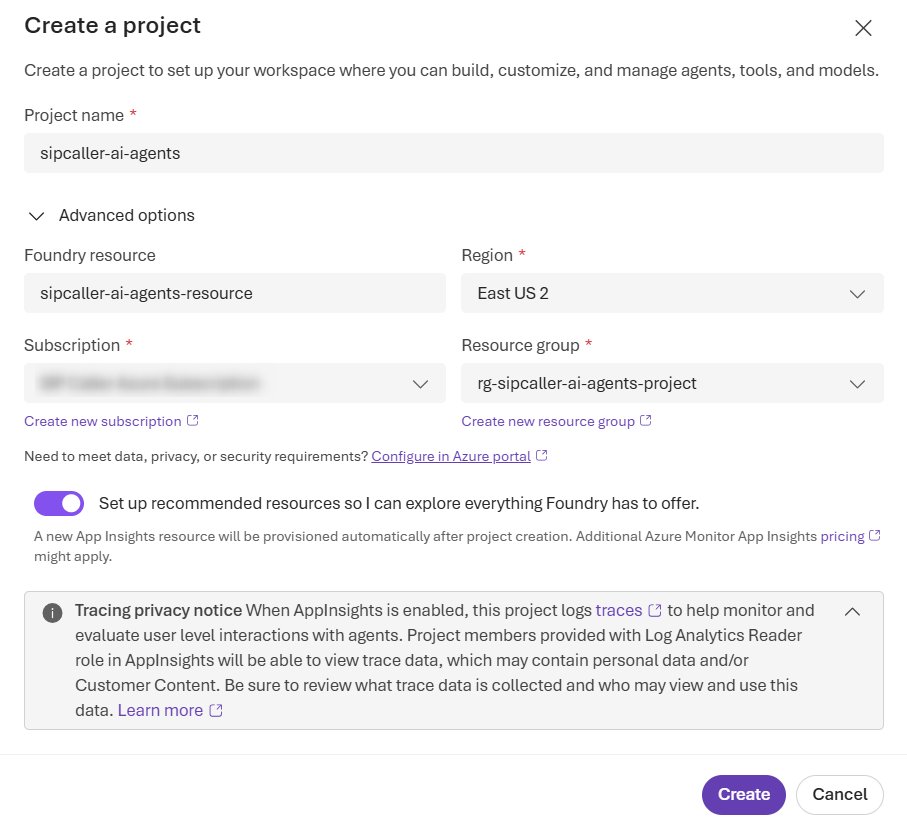
- Project name: a name to identify your project.
- Foundry resource: the Azure AI Foundry resource to associate with this project.
- Region: the Azure region where the resource will be hosted.
- Subscription: the Azure subscription that will be billed for usage.
- Resource group: the resource group to organize and manage your Azure resources.
Step 2 — Retrieve the API Key and Endpoint
Once the project has been created, you will find the API key and the Project endpoint on the project overview page.

Step 3 — Configure SIP Caller
API Key: copy the API key and paste it into the API Key field in SIP Caller.
Endpoint: the Project endpoint shown in Azure AI Foundry follows this format:
https://sipcaller-ai-agents-resource.services.ai.azure.com/api/projects/sipcaller-ai-agentsThe value to enter in SIP Caller is only the first part — up to and not including /api/projects/...:
https://sipcaller-ai-agents-resource.services.ai.azure.com